Documentation

Magnolia CMS Connector
For a general introduction to the connector, please refer to .
Magnolia Configuration
In order to crawl Magnolia using this connector, Magnolia pages must be exposed via REST APIs.
In order to do so, you need to have the Magnolia REST Module installed and you need to create delivery endpoints.
Delivery endpoints need to be created for each workspace, which should be indexed. These provide REST endpoints which expose the JCR data.
Endpoints can be created as follows. Create a file called light-modules/define-delivery-endpoint/restEndpoints/delivery in your Magnolia deployment folder.
There, please add
$type: jcrDeliveryEndpoint_v2
workspace: <workspacename>
depth: 10
nodeTypes:
  - mgnl:page
  - mgnl:area
  - mgnl:component
  - mgnl:content
  - mgnl:contentNode
childNodeTypes:
  - mgnl:page
  - mgnl:area
  - mgnl:component
  - mgnl:contentNode
where <workspacename> is the identifier of the workspace. Afterwards, a REST endpoint becomes available at .rest/delivery/<workspacename>.
You can configure the connector to index specific components. By default it indexes mgnl:content and mgnl:page objects.
Content Source Configuration
The content source configuration of the connector comprises the following mandatory configuration fields.
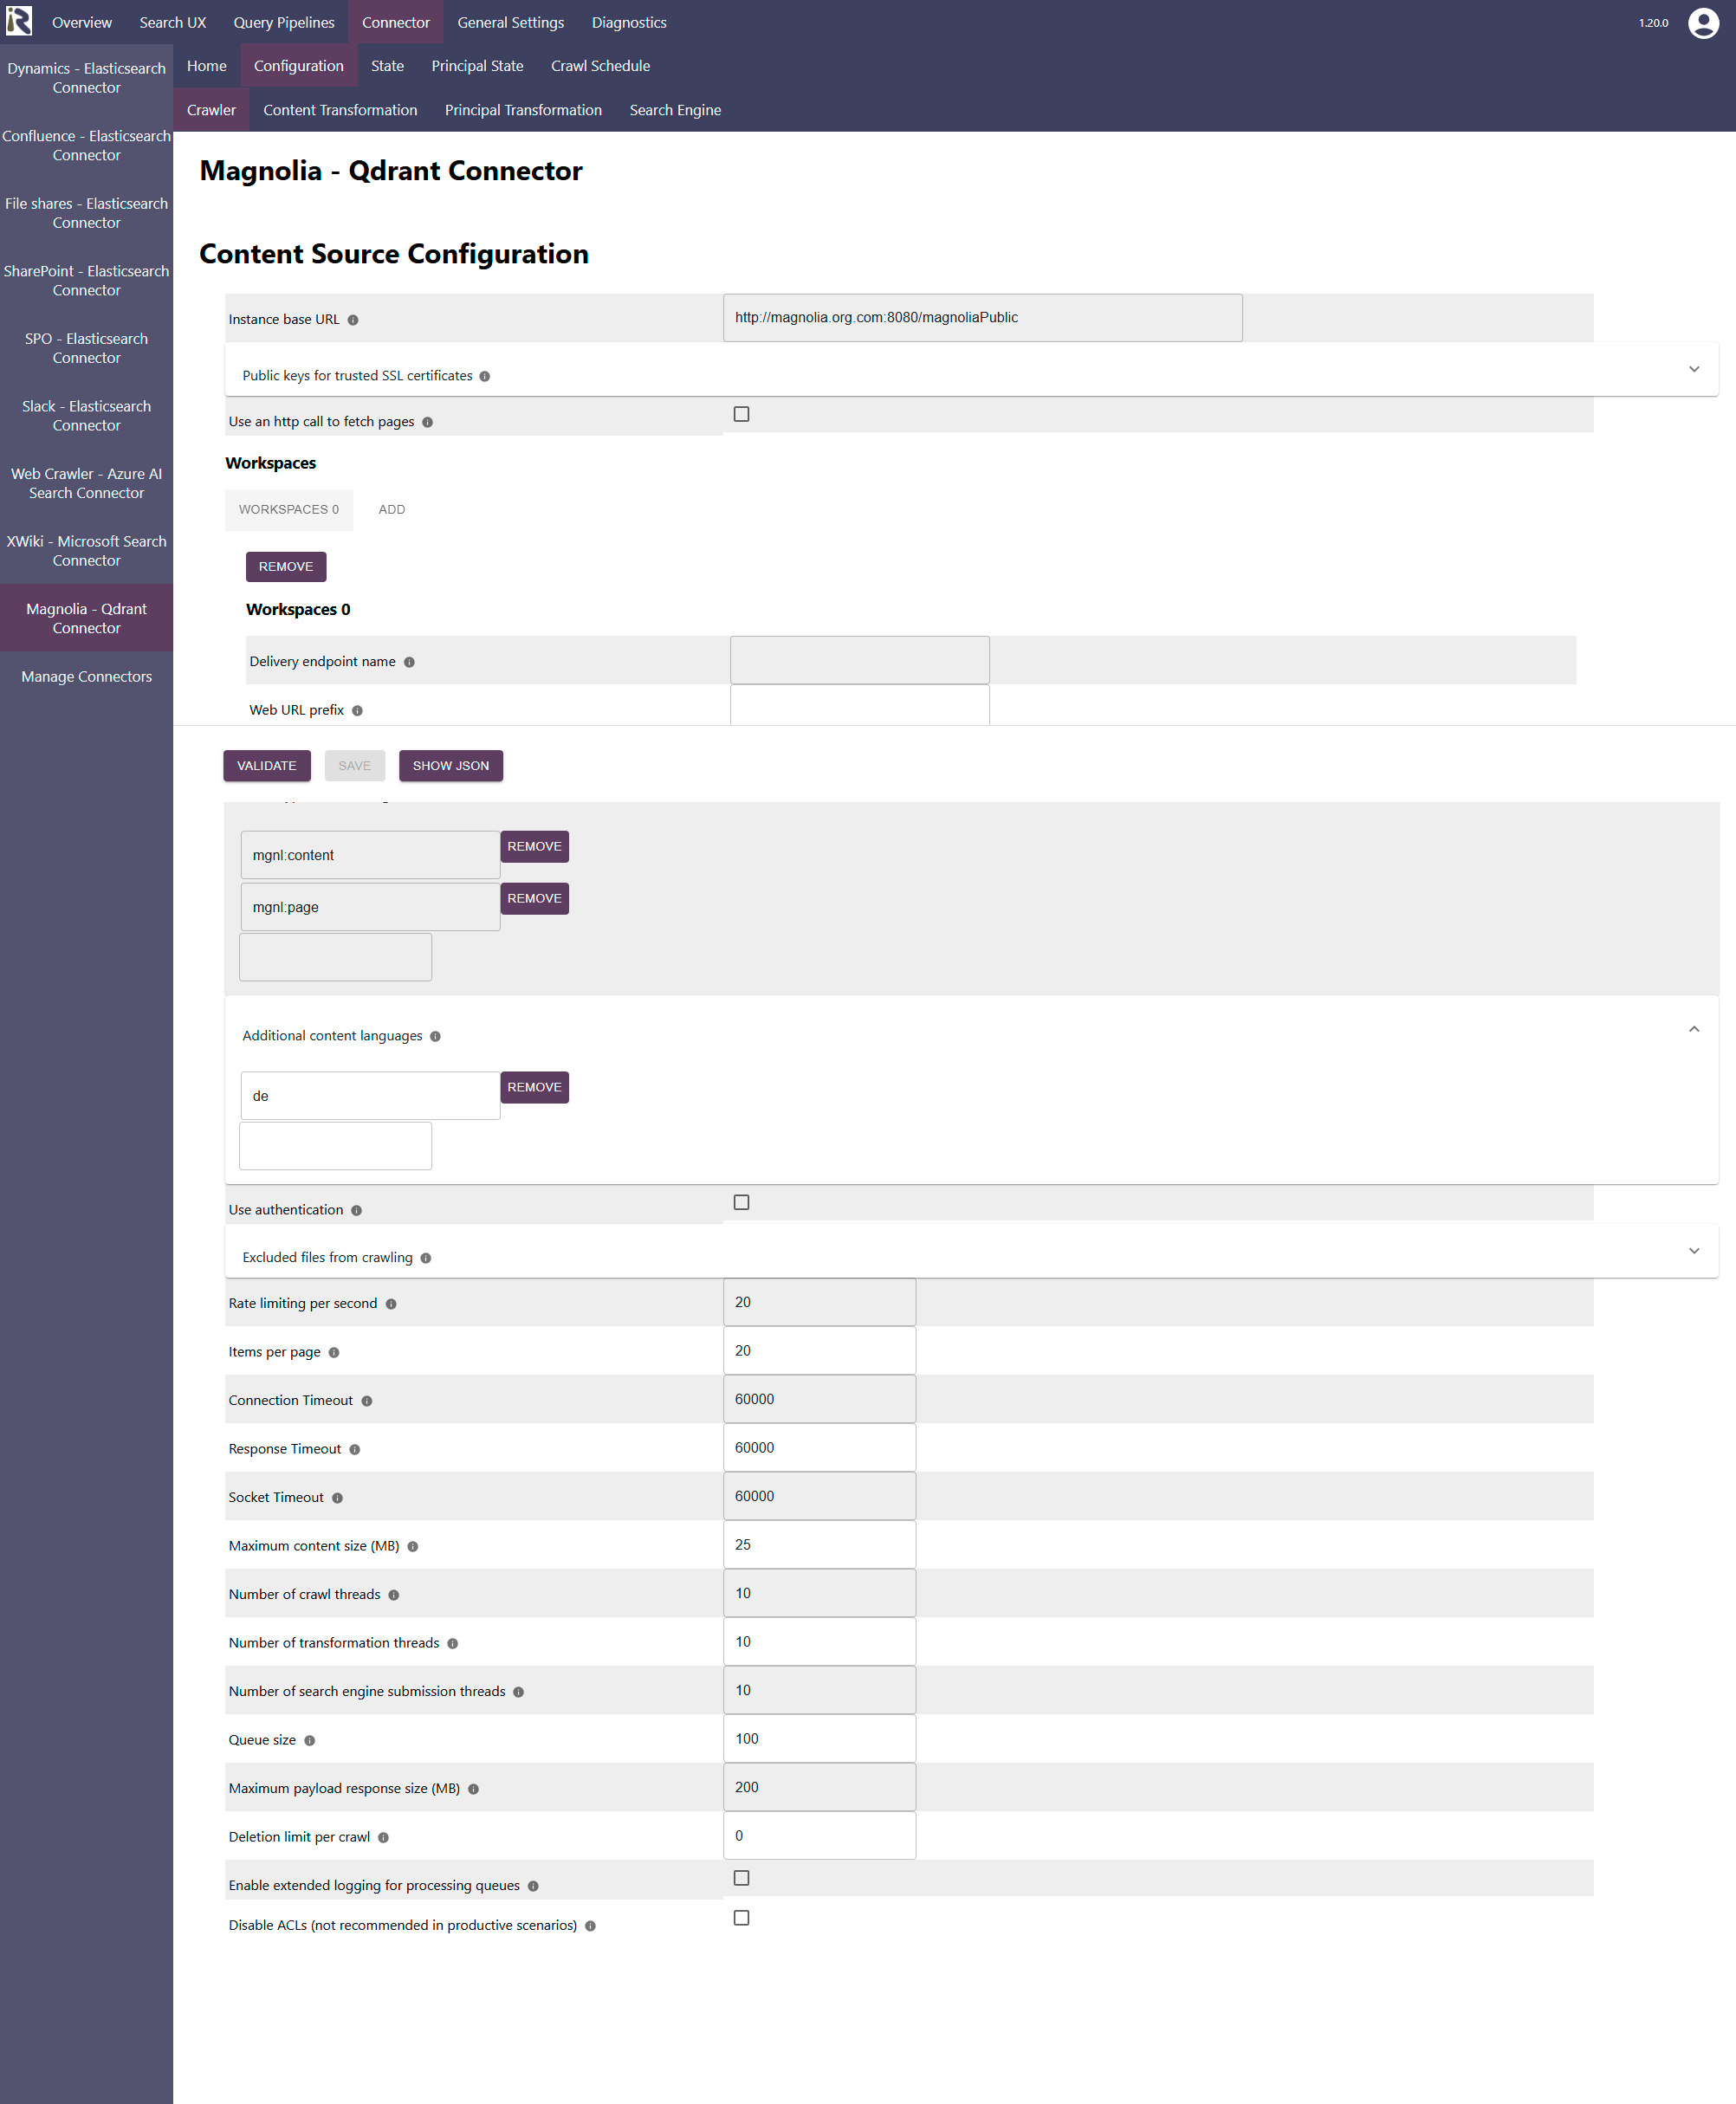
Instance base URL. This is the fully qualified domain name or host name of the Magnolia instance up to below the rest endpoint defined above. It should include port and come without trailing slash.
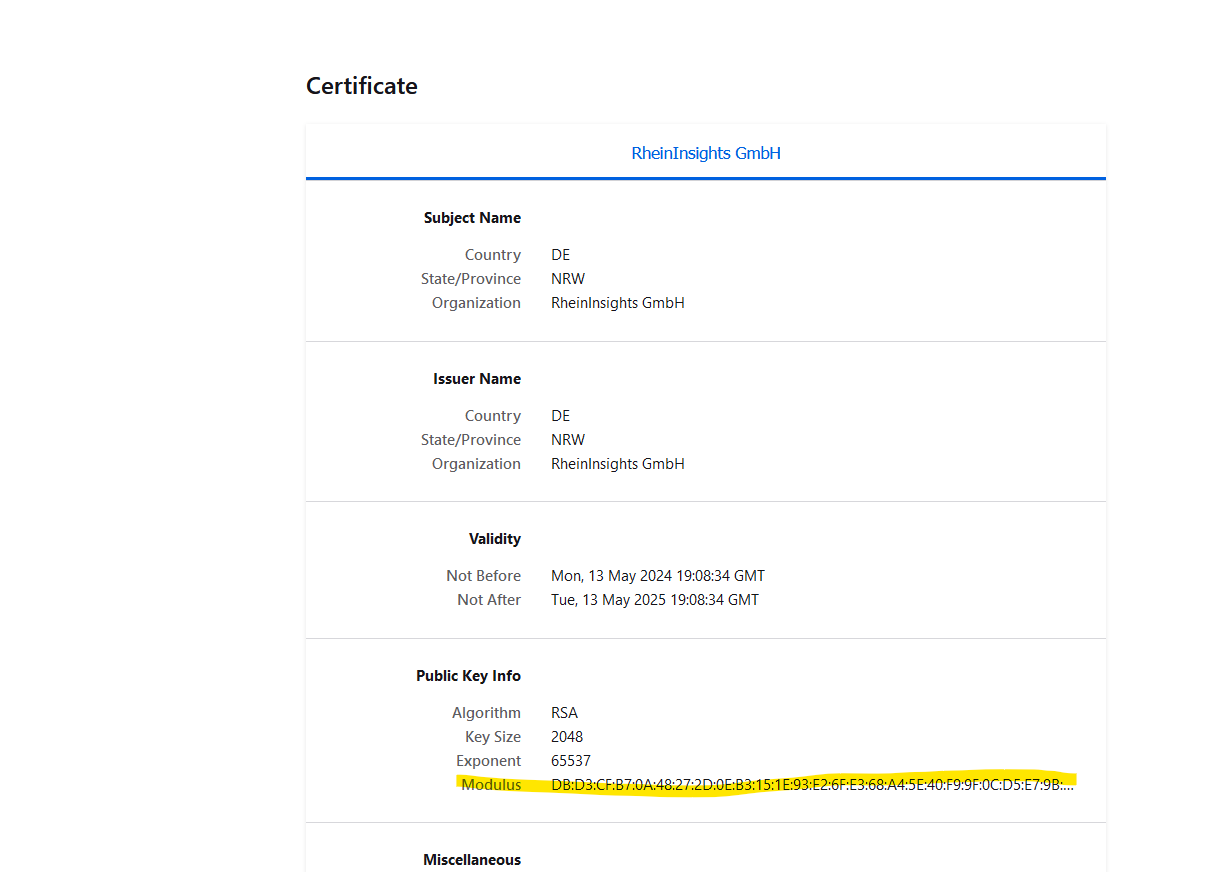
Public keys for SSL certificates: this configuration is needed, if you run the environment with self-signed certificates, or certificates which are not known to the Java key store.
We use a straight-forward approach to validate SSL certificates. In order to render a certificate valid, add the modulus of the public key into this text field. You can access this modulus by viewing the certificate within the browser.
Use an http call to fetch pages: If turned off, the connector will generate the binary page content based on the component structure provided by Magnolia. For some content pages, for instance components, this will only include the component contents but not headers, footers and additional data. If you like to index the entire page as it is displayed to your users, then activate this checkbox.
Workspaces
Here you need to configure the respective rest endpoints for your individual workspaces. For instance website and tours (cf. the standard Magnolia demo).Delivery endpoint name. This is the endpoint name for the workspace you like to have indexed. Each endpoint has to be defined as described in the section “Magnolia Configuration” above.
Web URL prefix. This is the url prefix which is needed to tell the connector where the actual HTML page resides for the workspace. If you index the Magnolia CMS demo, then this is empty for the website workspace and must be tours for the tours workspace.
Node types for indexing. Here, provide a list of node types which should become indexed documents. By default this is mgnl:page and mgnl:component. However, you can also index fragments individually, if you have such a use case.
Additional content languages. In this list you can add language codes so that other languages of a multilingual Magnolia instance can be indexed. By default the connector queries the standard language. This does not need a language code. If you have a second or third language besides the standard, then add the language codes here.
Use authentication. If enabled, the connector uses basic authentication to authenticate against the Magnolia REST endpoint.
Login: optional user name for basic auth.
Password: optional password for basic auth
Rate Limiting. This will define a rate limiting for the connector, i.e., limit the number of API requests per second (across all threads).
Page size for requests. Defines how many pages will be fetched per API request. Default is 100.
Response timeout (ms). Defines how long the connector until an API call is aborted and the operation be marked as failed.
Connection timeout (ms). Defines how long the connector waits for a connection for an API call.
Socket timeout (ms). Defines how long the connector waits for receiving all data from an API call.
The general settings are described at General Crawl Settings and you can leave these with its default values.
After entering the configuration parameters, click on validate. This validates the content crawl configuration directly against the content source. If there are issues when connecting, the validator will indicate these on the page. Otherwise, you can save the configuration and continue with Content Transformation configuration.
Recommended Crawl Schedules
The connector only support full scans and recrawls. Therefore, we recommend to configure full scans to run every 4 to 12 hours. For more information see Crawl Scheduling .